Projects

Finishing the Power Supply

Posted in Electronics, Power Supply on October 25th, 2009 by nisburgh – Be the first to comment
This is part 4 of 4 in the series Variable Power Supply

I now had a power supply that delivered two independent, variable outputs – but I had no easy way to hook up to the outputs, know their voltages or switch them ( without unplugging the cord ). So, to round out the final product, I added some 3 amp breakers, voltmeters, switches and binding posts.

Drilling complete

Drilling complete

Here’s a shot of the project box after drilling holes for four binding posts, main power switch, power input cord and the breakers.

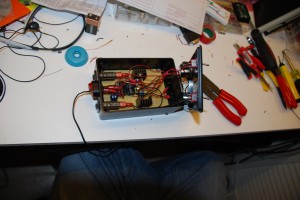
Connected together - lots of wires!

Connected together - lots of wires!

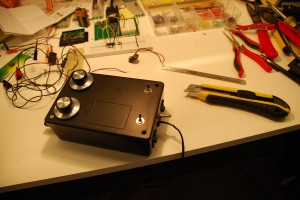
In this shot, you can see that I’ve installed the breakers ( long black devices on the left side ), the main power switch ( red switch on left ), the power input cord feeds into the blue screw-down terminal block and the individual control switches on the lid which allow you to control each output. A whole mess of wires, but not unmanageable. BTW, I found some great strain relief grommets at Fry’s. Just drill a hole in your box, put your wire in the strain relief grommet, snap the top in place and shove it into the hole – it provides a very secure and robust wire connection that prevents putting any strain on the screw-down terminal on the PCB. Definitely keep an eye out for those.

Binding posts!

Binding posts!

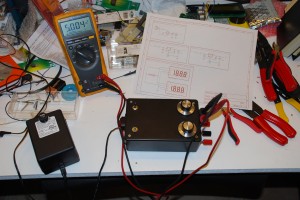
Binding posts installed, cover secured – and pumping out a near perfect 5 volts! The last step is to add the voltmeters.

Cutting in some windows

Cutting in some windows

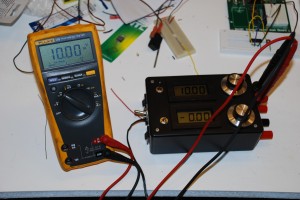
Cutting out the holes for the digital panel meters. The meters I found were Velleman units from Fry’s. Easy to use and install, but not isolated like I mentioned before. Follow the instructions included with the unit to move the decimal point jumper ( blob-o-solder ). Most digital panel meters are shipped from the factory ready to read 0-200mV. That’s not too useful for our application, so we need to follow the instructions to create a voltage divider on the input so we can display in the range of 0-20VDC. It’s actually quite simple – you remove a couple of 0402 SMT resistors, then solder in some new ones ( SMT or PTH – connections are provided for both ) – a 10M and a 100k for the 0-20VDC range, if I recall correctly. After that, hook up a battery and the sensor leads. Use your calibrated multimeter to dial in 10 VDC on your power supply, then adjust the trimpot on the back of the panel meter until it reads 10.00 VDC. Now your new panel meter is calibrated and all that’s left is mounting it in the project box!

Finally!  My own dual-output variable power supply!

Finally! My own dual-output variable power supply!

Final product! You’ll notice that the main power switch changed – I had to do this so I could switch the power to the supply and the voltmeters with one switch ( DPST ). That wraps up the series on building a dual output variable power supply for the home workbench. Feel free to leave questions or suggestions in the comments!
Temporary prototype to permanent prototype!

Posted in Power Supply on October 12th, 2009 by nisburgh – Be the first to comment
This is part 3 of 4 in the series Variable Power Supply

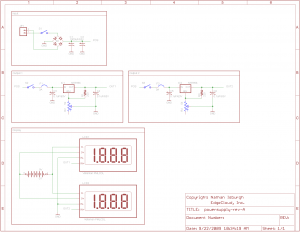
Now that I had a working system, I needed to make it a little more permanent.  First of all, I wanted dual outputs, so here’s the new schematic I put together.

Simple variable power supply schematic

Simple variable power supply schematic

You’ll notice that the voltmeters are run off a separate battery.  This frustrated me to no end.  Basically, most digital voltmeters *require* an isolated power supply.  You can get high end units that self isolate, but they’re about $100 each.  I wanted digital for accuracy ( this problem only affects digital VM’s – analog would have worked as is ), so I just decided to go with the battery option and see how long it lasts.  I’d be curious what it might have taken to separate off a 9V supply and isolate it from the variable outputs.. I messed with it for a while, but the closest I got was a voltmeter with a pretty heavy bow in it’s accuracy curve. :)


Coming along nicely

Coming along nicely

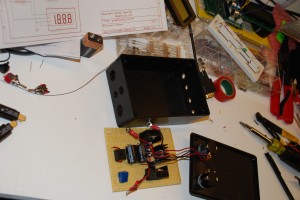
Anyhow, off to Radio Shack and Fry’s for a few more pieces!  Proto board, plastic enclosure and extra parts to build a dual output power supply.  After I cut the board down and drilled mounting holes, I started moving components from the breadboard to the more permanent proto board.  Here’s a shot shortly after starting to solder.  I mostly used the long leads from the components to bridge everything together.  It’s not the prettiest option, but the cost/speed beats a one-off custom PCB.  Note the beefy heatsinks for the regulators.  An absolute must!  I was reading 145 °F on the heatsink just powering a stamp, LCD and PING))) sensor.


Not easy to use, but it works!

Not easy to use, but it works!

After a couple hours of soldering, fabrication and connecting parts, I had the beginnings of a working lab supply!


Up next, switches, voltmeters and binding posts!

Water Detection Circuit

Posted in Projects on October 4th, 2009 by nisburgh – Be the first to comment

So one of the first sensors I would like to implement for the sensor mesh is a simple water detector.  You know, for washer machines, refrigerators, water heaters, etc.  Let’s you know when you’ve got a leak.  I wanted the circuit to be simple and low power, since it would almost certainly be run off a battery, and the RF gear alone was going to suck most of the available juice.  I also wanted a circuit external to the microcontroller to remember ( latch! ) if we had a leak condition, that way I could let the microcontroller and RF module sleep for a few minutes between checks, but still capture transient leak conditions ( What if a droplet hit the sensor, but then rolled off due to slope? ).

Anyhow, water is not nearly as conductive as you would think.  Rudimentary testing of water droplets indicated about 200k-500k of resistance.  My first, simple attempt at a water detection circuit did not take this into consideration.

Simplistic water detection circuit

Simplistic water detection circuit

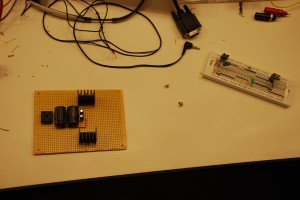
Here’s a snapshot of the test circuit I built.  It works great using that little tactile switch.  But it doesn’t have the capability to pull the S input on the S-R flip flop to ground when running through water.  That’s simply because the path to ground for the VCC pullup has too high a resistance ( 200k-500k through water ) to drop the voltage below 0.8V, necessary for a TTL low signal.  I didn’t bother putting together an eagle schematic for this design since it didn’t work.  :)   The astute will notice I don’t actually have it wired up to an R-S flip flop ( 74279 ).  I didn’t have one on hand, so I built one with a 7400 I had in stock.

At his point, I figured that I needed some amplification of the current I was able to push through a drop of water, so obviously a transistor came to mind.  A standard NPN transistor ( 2N2222 ) wouldn’t do, though, since it doesn’t provide adequate amplification of the base current produced by 5V pushing across 200k-500k resistance.  What I needed was a Darlington transistor!  Amplify the amplification!

Working water detector!

Working water detector!

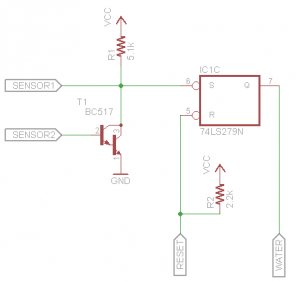
Here’s the circuit I put together using a Darlington NPN transitor to amplify the current that could be pushed through a drop of water at 5VDC.  When the power turns on, the microcontroller needs to reset the S-R flip flop by cycling the Reset line low then hold it high.  We have the S-R flip flop to “remember” when we have a moisture condition for the sleeping microcontroller.  The S input has a pullup resistor R1 just because it’s bad practice to leave a TTL input floating.  We connect that same signal to one end of our sensor probe ( SENSOR1 ), as well as the collector on our Darlington, T1.  The other side of our sensor ( SENSOR2) connects to the base of T1.  If we can push a mere fraction ( think millionths ) of an amp through that sensor, the Darlington is going to open up and dump all of the collector current through it’s emitter into ground.  This will draw the S input to ground, flipping the water signal on.  The water signal will not turn off until the Reset line ( R  on the S-R flip flop ) is pulled low by the microcontroller. Speaking of which, R2 is a pullup to make sure we don’t accidentally reset the flip flop during sleep/wake-up cycles, because on some microcontrollers, like the Stamp used here, the pins switch to inputs for 18 ms until the interpreter takes control.

Working water detector prototype!

Working water detector prototype!

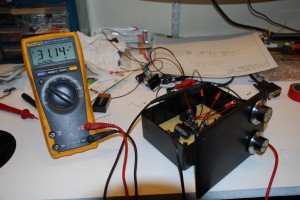
I put this design together and tested it – it couldn’t work better!   In fact, it’s able to detect the microamps that were able to push through my *body*.  The Hfe on the BC517 Darlington is 30k.  *Serious amplification!* Now I had a simple circuit that could remember a closed condition ( leak ) and could detect current flowing through megaohms ( necessary for detecting the presence of water ). Mission accomplished.

Messy, but functional!

Messy, but functional!


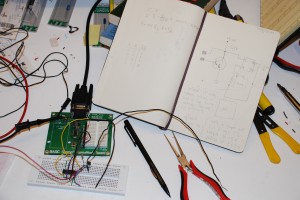
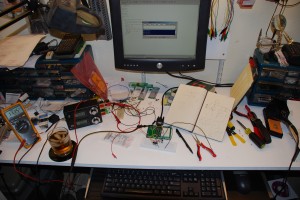
Here’s a final shot of my work area. Prototype, circuit, Jack Daniels, power supply, mess and all! :)

LED Fun

Posted in Projects on September 26th, 2009 by nisburgh – 2 Comments

I decided to swing by RadioShack after work yesterday and see what kinds of fun components I could snag.  I came across this tri-color LED ( datasheet – FYI: the green and blue pins are accidentally swapped in the data sheet ) from RadioShack for $2.99.  I’ve been looking at the same thing over on SparkFun – I just hadn’t gotten around to placing an order yet.  What follows is the simple circuit and software I wrote to give this cool LED a test run.  I used a Basic Stamp 2 module, 3 resistors and the LED.

LED Fun Schematic

LED Fun Schematic

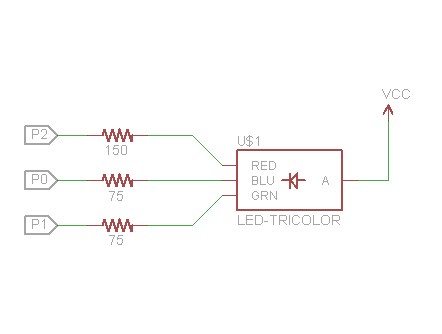
First of all, this is how you hook up the circuit.  Those resistance values are calculated using the typical voltages  on the data sheet.  I limited the amperage to 20 mA to protect the Stamp module and prolong the LED life.  I didn’t have 75Ω on hand, so I substituted 82Ω.

Wired up!

Wired up!

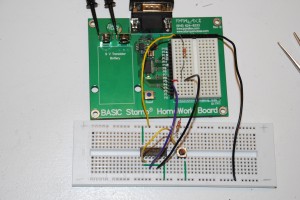
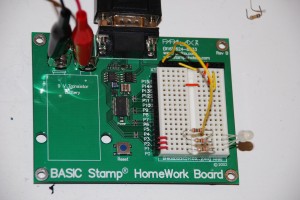
Here’s a picture of the HomeWork Board I used to wire up the circuit.  Ignore those wires at the top of the breadboard – that was for another project.  :)

I’ve uploaded the ( ugly ) source code I threw together to make the LED run through various sequences. Here is a small snippet showing a good way to achieve a smooth, randomly varying color sequence. I think this is a great way to show off an RGB LED:


rand = 188
r = 200
g = 200
b = 200
dr = 2
dg = 2
db = 2
DO
  PWM Red, r, 1
  PWM Green, g, 1
  PWM Blue, b, 1
  IF rand > 10 THEN
    RANDOM rand
    IF rand < 85 THEN
      dr = -dr
    ELSEIF rand < 170 THEN
      dg = -dg
    ELSE
      db = -db
    ENDIF
  ENDIF
  r = r + dr
  g = g + dg
  b = b + db
  IF r = 2 OR r = 254 THEN
    dr = -dr
    r = r + dr
  ENDIF
  IF g = 2 OR g = 254 THEN
    dg = -dg
    g = g + dg
  ENDIF
  IF b = 2 OR b = 254 THEN
    db = -db
    b = b + db
  ENDIF
LOOP

All of the variables are declared as bytes, and the Red, Green and Blue names are PIN aliases. The Stamp is a relatively slow processor, running at about 4000 PBASIC instructions per second. Such a slow execution speed forced me to get a little creative with the code to get a visually smooth shifting of colors. A quick run-down of the code:

  • Use PWM to output a very short ( 1ms ) burst of analog voltage according to the corresponding variable for each color. The astute will note that it's actually more of an "input" of voltage, as the current actually flows from Vcc through the LED and into the Stamp. Remember this when calculating current draw, as the Stamp can only sink 25mA per pin, and 50mA total per IO pin bank.
  • Decide randomly whether you're going to adjust one of the delta factors. This helps minimize the number of times you're doing extra comparisons and math. We have to keep those operations to a minimum because the LED is not lit during that time, and the longer you take to relight the LED, the more flicker you'll see.
  • If you are adjusting a delta, just randomly pick one to flip.
  • Add the deltas to the values
  • If one of the values gets too low or too high, flip the delta and re-add so you don't roll around, because the Bytes will roll over from 0 to 255 and 255 to 0. If you let that happen, the particular color it affects will suddenly turn on or off.

Feel free to tweak some of the numbers. You can achieve some neat effects by stretching out the output times, playing with which colors vary when, or even expanding the code to vary more than one delta at a time.

Here are a couple of action shots for your amusement. Enjoy!

LED in open

LED in open


LED diffused through wax paper

LED diffused through wax paper

Shopping!

Posted in Power Supply on September 24th, 2009 by nisburgh – Be the first to comment
This is part 2 of 4 in the series Variable Power Supply

Now that I had a basic design to prototype, I needed to collect all of the parts to test out the basic power supply circuit.

First iteration - variable power supply

First iteration - variable power supply

Austin does not have many options when it comes to electronics parts stores.  Up north you have Frys Electronics.  They have a pretty decent selection of components ( mostly NTE ), project boxes, wire, switches, supplies, tools and what not.  I’m not sure how long they will continue stocking this gear, though, as their real bread and butter seems to be consumer electronics – computers, stereos, tv’s, etc.  None the less, I found most of what I needed to complete a simple breadboard test of the supply.  Here’s a short list of what I used to put everything together.  The prices are from memory, so the accuracy is sure to be lacking.  :)

  • NTE 956 – $2 – adjustable positive voltage regulator, 1.5A, 1.2-37 VDC
  • NTE 5312 – $4 – 8A single phase bridge rectifier, up to 70VAC input
  • 1000 μF electrolytic capacitor, 50VDC – $4.  ( Always remember to derate your caps.  50% is the rule of thumb, so technically I shouldn’t run this power supply over 25V.  If you want to run all the way up to 37V, get 75V or better caps. )
  • 0.1 μF electrolytic capacitor, 50VDC – $0.50
  • 1 μF electrolytic capacitor, 50VDC- $0.50
  • 10 turn, 5k Ω potentiometer – $12 ( This was a high quality, audio grade pot ).  I went with the 10 turn for precision voltage selection.  Any 5k pot will work, just remember that the shorter the wiper travel, the harder it will be to set your voltage to exactly what you need.
  • A knob to fit the pot – $2

I had a breadboard and all the resistors I could ever want in the lab at home, so I didn’t need to buy them.  I probably also could have avoided buying the smaller caps, but I wanted to make sure I had the exact sizes.

With loot on hand, I carefully put the circuit down and double-checked every connection.  You might be wondering about some of the other parts listed in the schematic that I didn’t buy.  Since I was just testing at this point, I didn’t invest in a switch or a fuse, figuring that I would simply connect or disconnect a fused power source to verify the design.

Speaking of power sources, I looked for a decent transformer but couldn’t find one that would give me the voltage/amperage combination I sought.  Optimally, a transformer wound for a 120 VAC primary with a 36 VAC secondary rated for at least 60 VA ( or watts ) would allow me to run the circuit at full capacity – up to the maximum voltage and amperage the regulator can handle.  Check out an online giant like Mouser to find the perfect transformer for the job.

Since I couldn’t find one that matched those specs, I dug through my wall wart collection and found an old printer supply that output 28 VDC and could push 1A.  VDC?!  The schematic calls for a VAC input!  No big deal.  You can connect VDC or VAC to a bridge rectifier and it will correctly provide the positive and negative potentials at it’s outputs regardless of how you hook up the input.  Just check the schematic if you don’t believe me.  :)   Having the rectifier in place gives my power supply the ability to handle direct or alternating current input.

With everything checked on the breadboard, I hooked up the wall wart and did the first smoke test.  Nothing smoked, popped or fried!  Good sign!  Hooking my Fluke to the output, I verified a roughly 1.2VDC signal on the output.  Dialing up the pot, I watched the voltage climb up and up, eventually topping out at about 30 VDC.  Success!

Next up, conversion to dual variable output, dissipation consideration and the beginning plans for a permanent power supply system.

Initial design

Posted in Power Supply, Schematics on September 22nd, 2009 by nisburgh – 2 Comments
This is part 1 of 4 in the series Variable Power Supply

I started tinkering with electronics again recently and quickly realized the need for a good power supply.  Shopping around, it became apparent that a decent dual-output unit was going to set me back quite a bit.  So I started doing some research on what would be involved in a simple little power supply I could build on my own.  Enter the LM317 variable positive voltage regulator.  Fantastic little IC capable of providing up to 1.5A and 1.2-36 volts.

First iteration - variable power supply

First iteration - variable power supply

Here was the first schematic I put together from various circuit designs available around the internet.

Working from left to right, we have our 120VAC input, which goes through a switch and a fuse to energize a basic 120/28 or 120/36 step down transformer.  ( BTW, it’s very difficult to find a transformer of that size with the VA rating to handle a couple of these power supply circuits at full output! ).

Now that we’ve stepped down our common household voltage, we rectify it using a standard bridge rectifier B1 ( 2A for safety ), followed by a large capacitor and a small one.  The 1000μF cap is there to provide substantial current in the event of transient demand spikes.  This large capacitor, though, does not respond very quickly, so we paired him up with a 0.1μF cap for higher frequency pulse suppression.  These caps help cut down on voltage ripple in the eventual output.

Next we have the workhorse of the circuit, the LM317.  Note that most manufacturers that produce regulators will have something comparable to the 317.  You don’t have to have the actual National Semiconductor part for this project ( I don’t!  I use an NTE956 because it was readily available at Fry’s Electronics ).  Any 1.2V-36V variable positive voltage regulator with a 1.5A output will do fine.  Double check that pinout!

Anyhow, the 220Ω resistor ties back in to the adjust pin as feedback gain, which you then pull down with the 5kΩ potentiometer.  The more current fed into adjust, the higher the output voltage.  Hence, as you increase resistance on the pot, you increase the output voltage!  All the way up to about 36VDC!  BTW, another fantastic feature about these regulators is that they’re extremely hardy, with built-in overload and thermal protection features.

Finishing up the circuit walkthrough, we have one more cap, C4, rated at 0.1μF, for further noise suppression and to hopefully limit our voltage ripple to an acceptable level.  Once I get a good oscilloscope, I’ll let you know what the actual ripple is.

In later posts, I’ll cover the ongoing construction of this project, along with adding a second output and voltmeter displays.